![Iconmark - Blue.png]](https://learn.onboard.io/hs-fs/hubfs/Iconmark%20-%20Blue.png?width=40&height=40&name=Iconmark%20-%20Blue.png)
After you have created a document signing template, you can now create (or edit an existing task) to include this document to be signed by the proper parties at the right time! Check out the instructions below for a step by step guide to adding a document for signature to a Project task within Onboard.io.
1. Create or edit a task
Head to your Task Repository and click 'Add Global Task' or 'Add Task'. Within this create task modal choose Task Type 'Document Signing'.
2. Choose the document
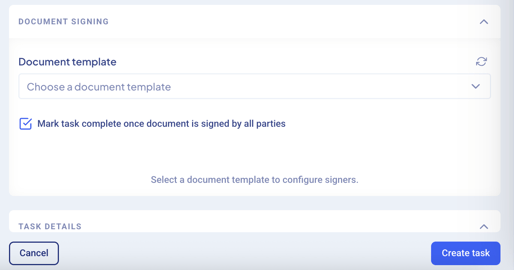
Scroll down to the 'Document Signing' section and pick the document this task should use:
Select one from your library (shown as dropdown values/cards), or
Add a new document right here without leaving the task — it's saved to your library automatically and selected for this task.
Select the 'Mark task complete once document is signed by all parties' box to ensure your task is automatically marked as complete once the final signature is applied to your document.
3. Choose who signs
Add a recipient for each person who needs to sign, in the order they should sign. Note that the application will bring in the pre-defined signer information as established within the document template, but you are able to re-configure these as desired. For each recipient, pick how Onboard should find them:
Email — a specific email address (great for one-off or external signers).Role — whoever holds a given role on the project. Onboard fills in the real person automatically per project, so the same task works for every customer.
Team member — a specific person on your team.
Each recipient lines up with a signer slot from the document by signing order, so the right person gets the right fields.
Mix and match freely — for example, the customer signs first (by role) and an account manager countersigns (team member).
4. Save
Save the task. If it's part of a project template, the document and its recipients travel with the template, so every project created from it includes this signing step.
What happens next
Nothing is sent yet. The document comes to life when the task runs in a real project —
Tips
- Prefer Role recipients in templates so one task works across all your customers.
- The signing order you set here is the order recipients are matched to the document's signer slots.
- Scroll down to 'Assignment' and assign this task to the role of the person who should be the first signer of the document. (this ensures that this task is automatically assigned to that person)